|
|
Support for the RS Toolkit 2000
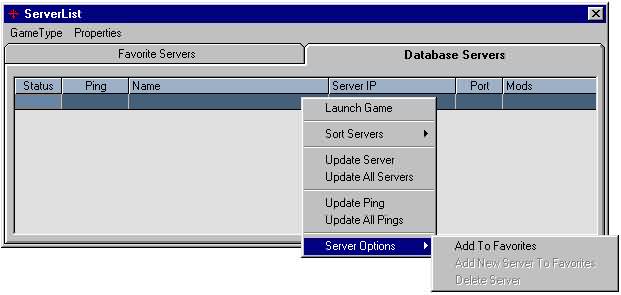
Post Your Server: Clicking on the "Post Server" button on the main window will bring up a form to add your server to the database listing. Once your IP is in there, others can then see when your server is online hosting and the button turns to "Remove Server". There is an option in "Server Options" under 'Create Game Opts' to immediately notify people when you host. If you are hosting a private game or don't wish your server to be added to the database, you can click the "Remove Server" button. Server Listing How-to: As you can see there is a tab that has two different options, Favorites and DB. The favorites tab lets you store the servers you visit frequently, and the DB tab has a list of all the servers that are online in the ServerList DataBase from the RS Retreat Server List. There are some functions that are specific to the two tabs and some which are not.
Ill start first with the functions you can use on both the tabs. First there is a menu bar at the top, The first
menu is “Game Type” this allows you to have different list of servers for each of the different Rainbow Six line of games.
The second Item is the “Properties” menu. Inside the properties menu there is a “Socket Timeout” option. If we select
this option a new window pops up that allows us to change the “Timeout” of the socket. Let me explain for you what a
socket is. I'll give you the easy definition, basically a Socket is a means of connecting between computers over the
Internet. We use the Socket to see if a game is up at a certain IP. Some times the Internet is slow due to traffic, Now to the meat. We have a popup menu that appears when you left click on the grid(this is where all the servers are listed). Inside this menu you will find a bunch of different functions.
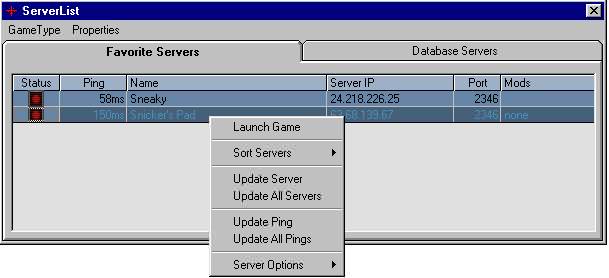
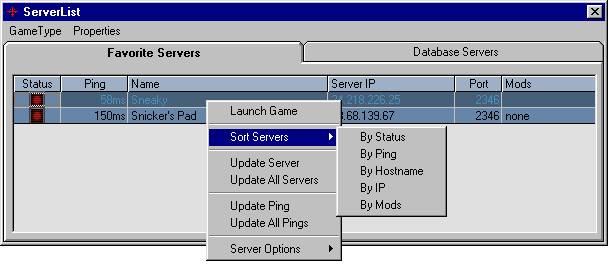
The first and most simple option we have is “Launch Game”, like it says it launches a client game at the IP specified. Next we have “Sort Servers”. You have the option of sorting the servers by IP, Hostname, Status, Ping and Mods. I think that’s pretty self-explanatory.
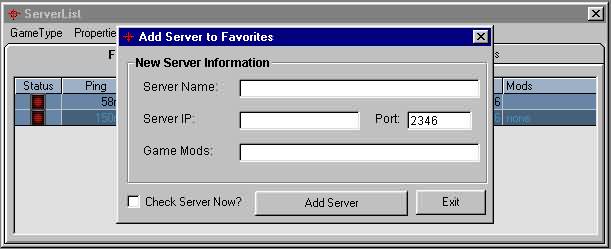
Now we come to the tab specific options. First the Favorites Tab. On the menu we have “Add New Server To Favorites”, this brings up a window that allows us to enter information about a server.
You enter the IP, Hostname, Port and Mods if any. Once you have entered all the server information you have the option to check the status of the server. You can do this by checking “Check Server Now?” You may add as many servers as you want by clicking on “Add Server”, when you are done just click on the “Exit” button. The other option is that you may delete a server that you have added, just highlight the server then click on “Delete Server” from the popup menu, you will be asked if you want to delete the game, a yes answer will remove it from the list. Now to the DB tab, There is only one option specific to the tab and it is the “Add to Favorites”, this option when
selected will add the currently selected server to you favorites list.
|